Southwest Style Chickpea Pasta

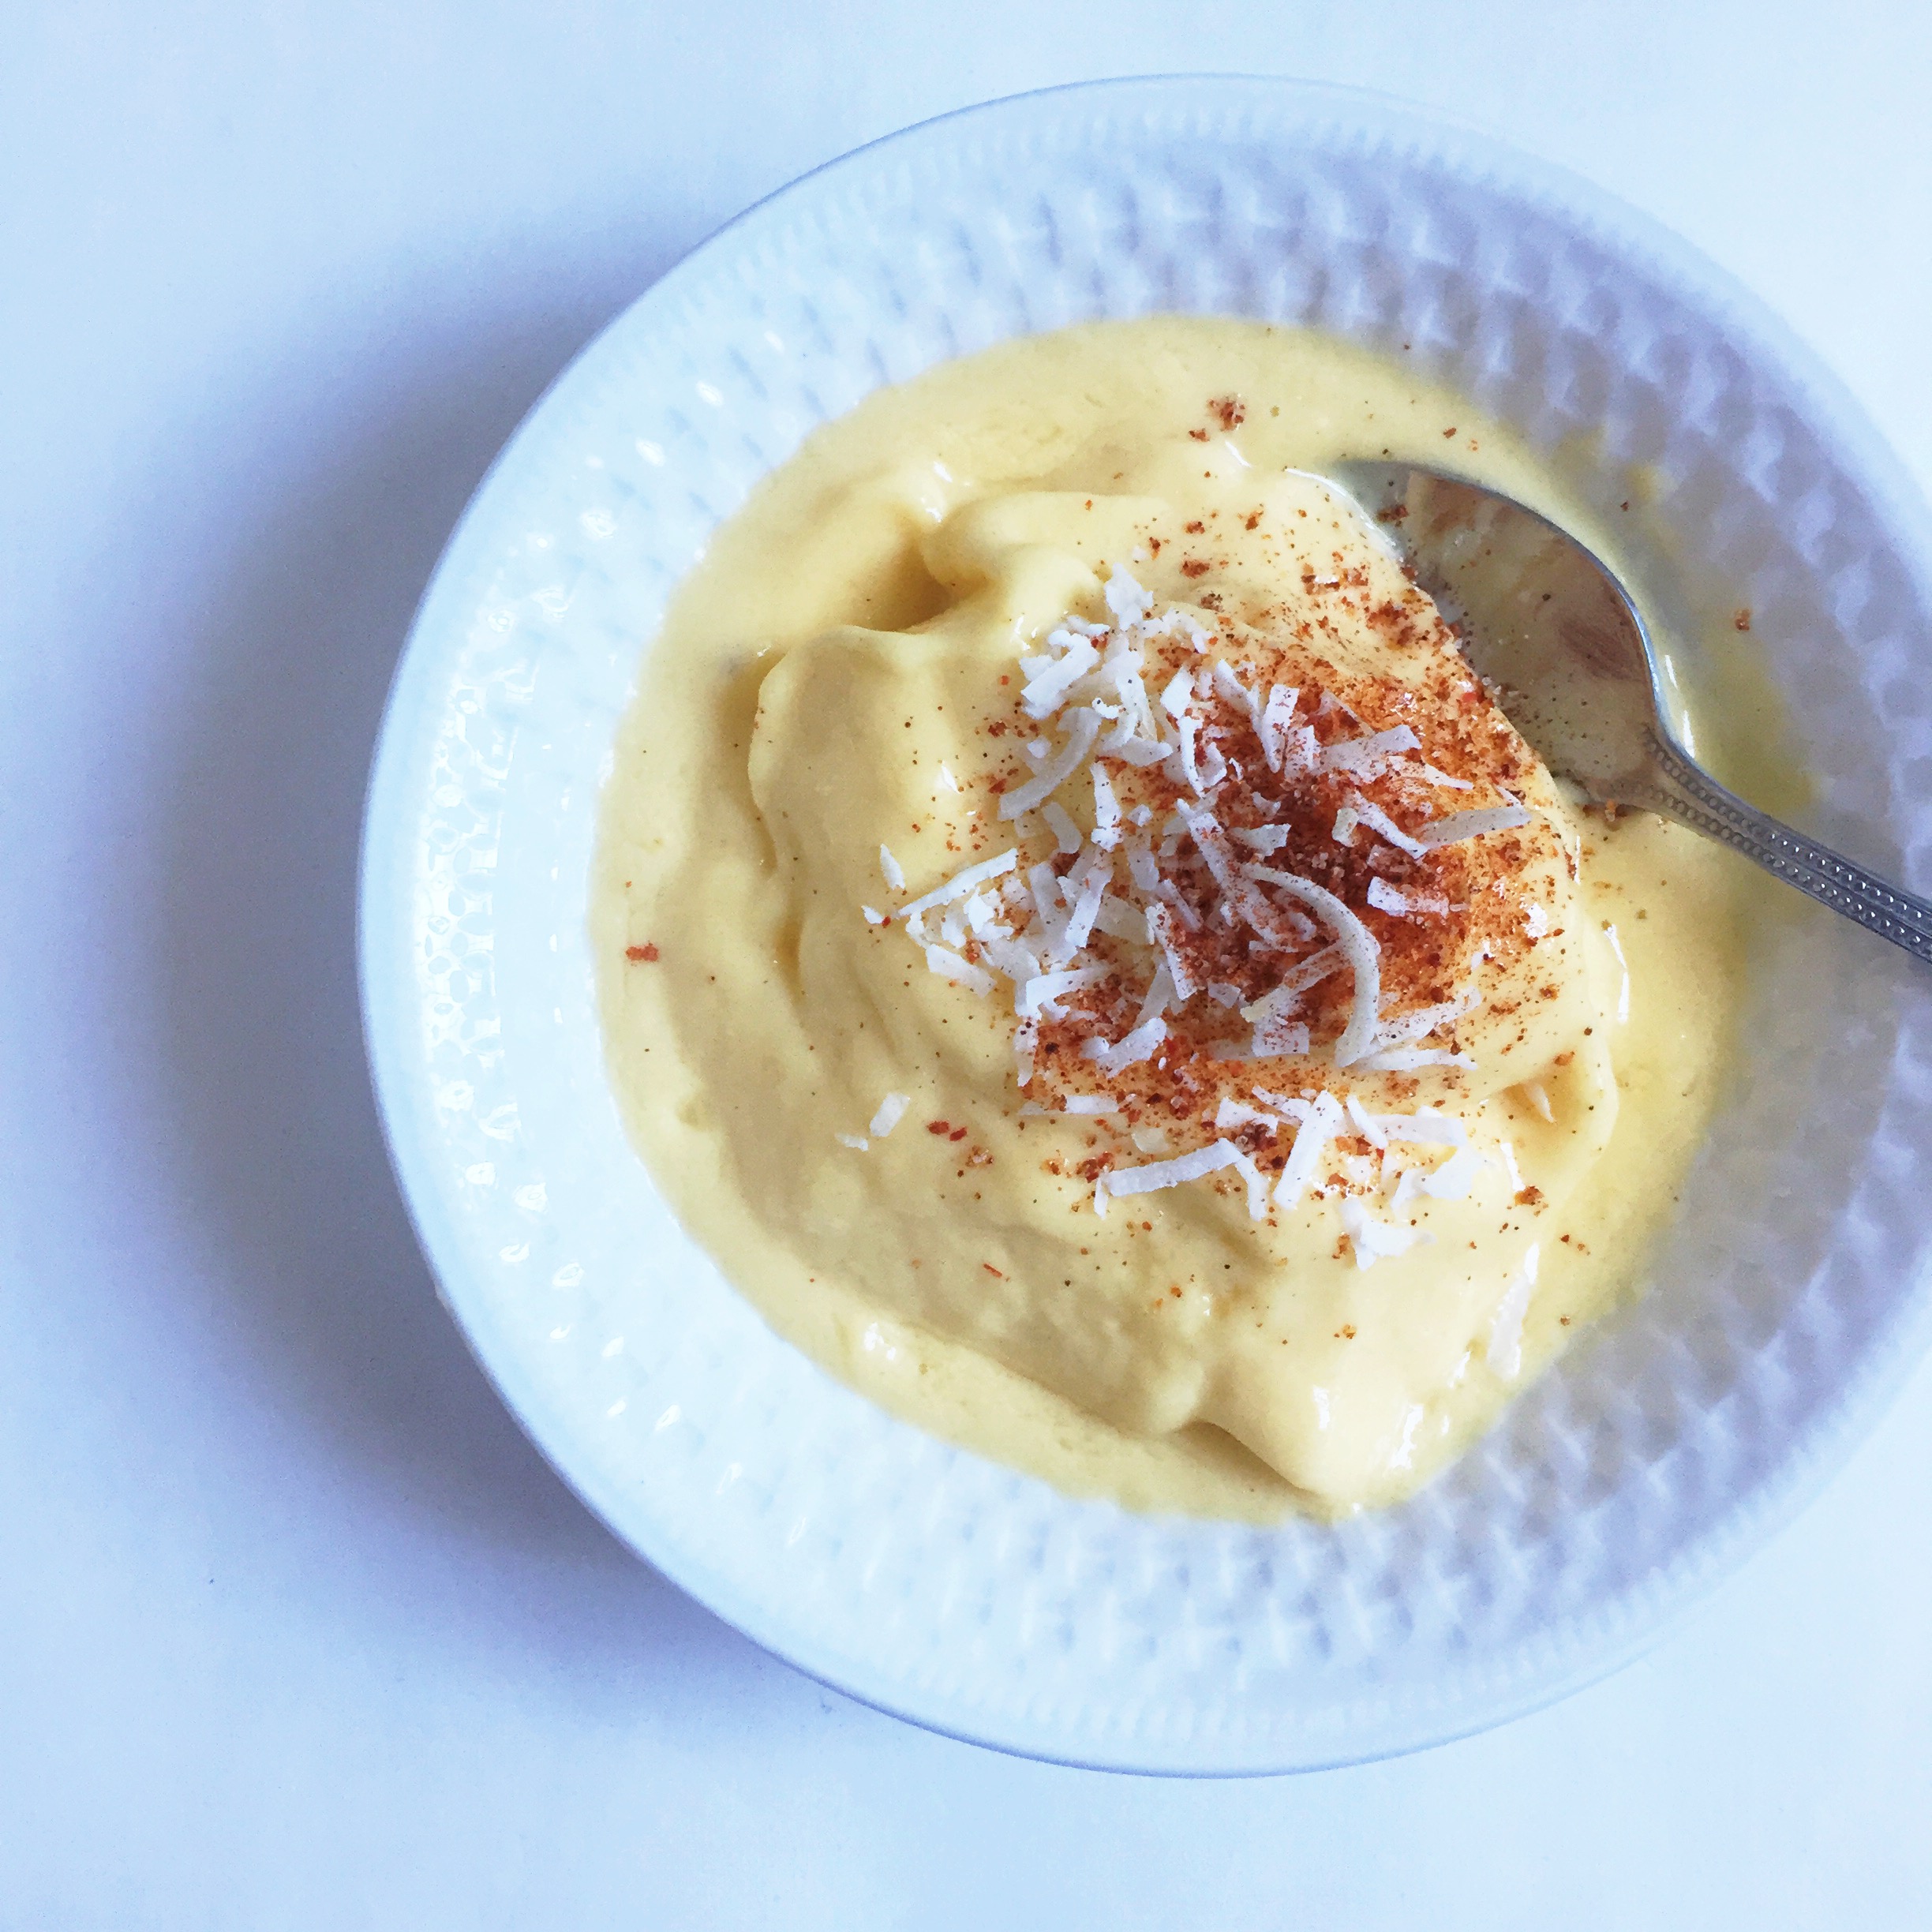
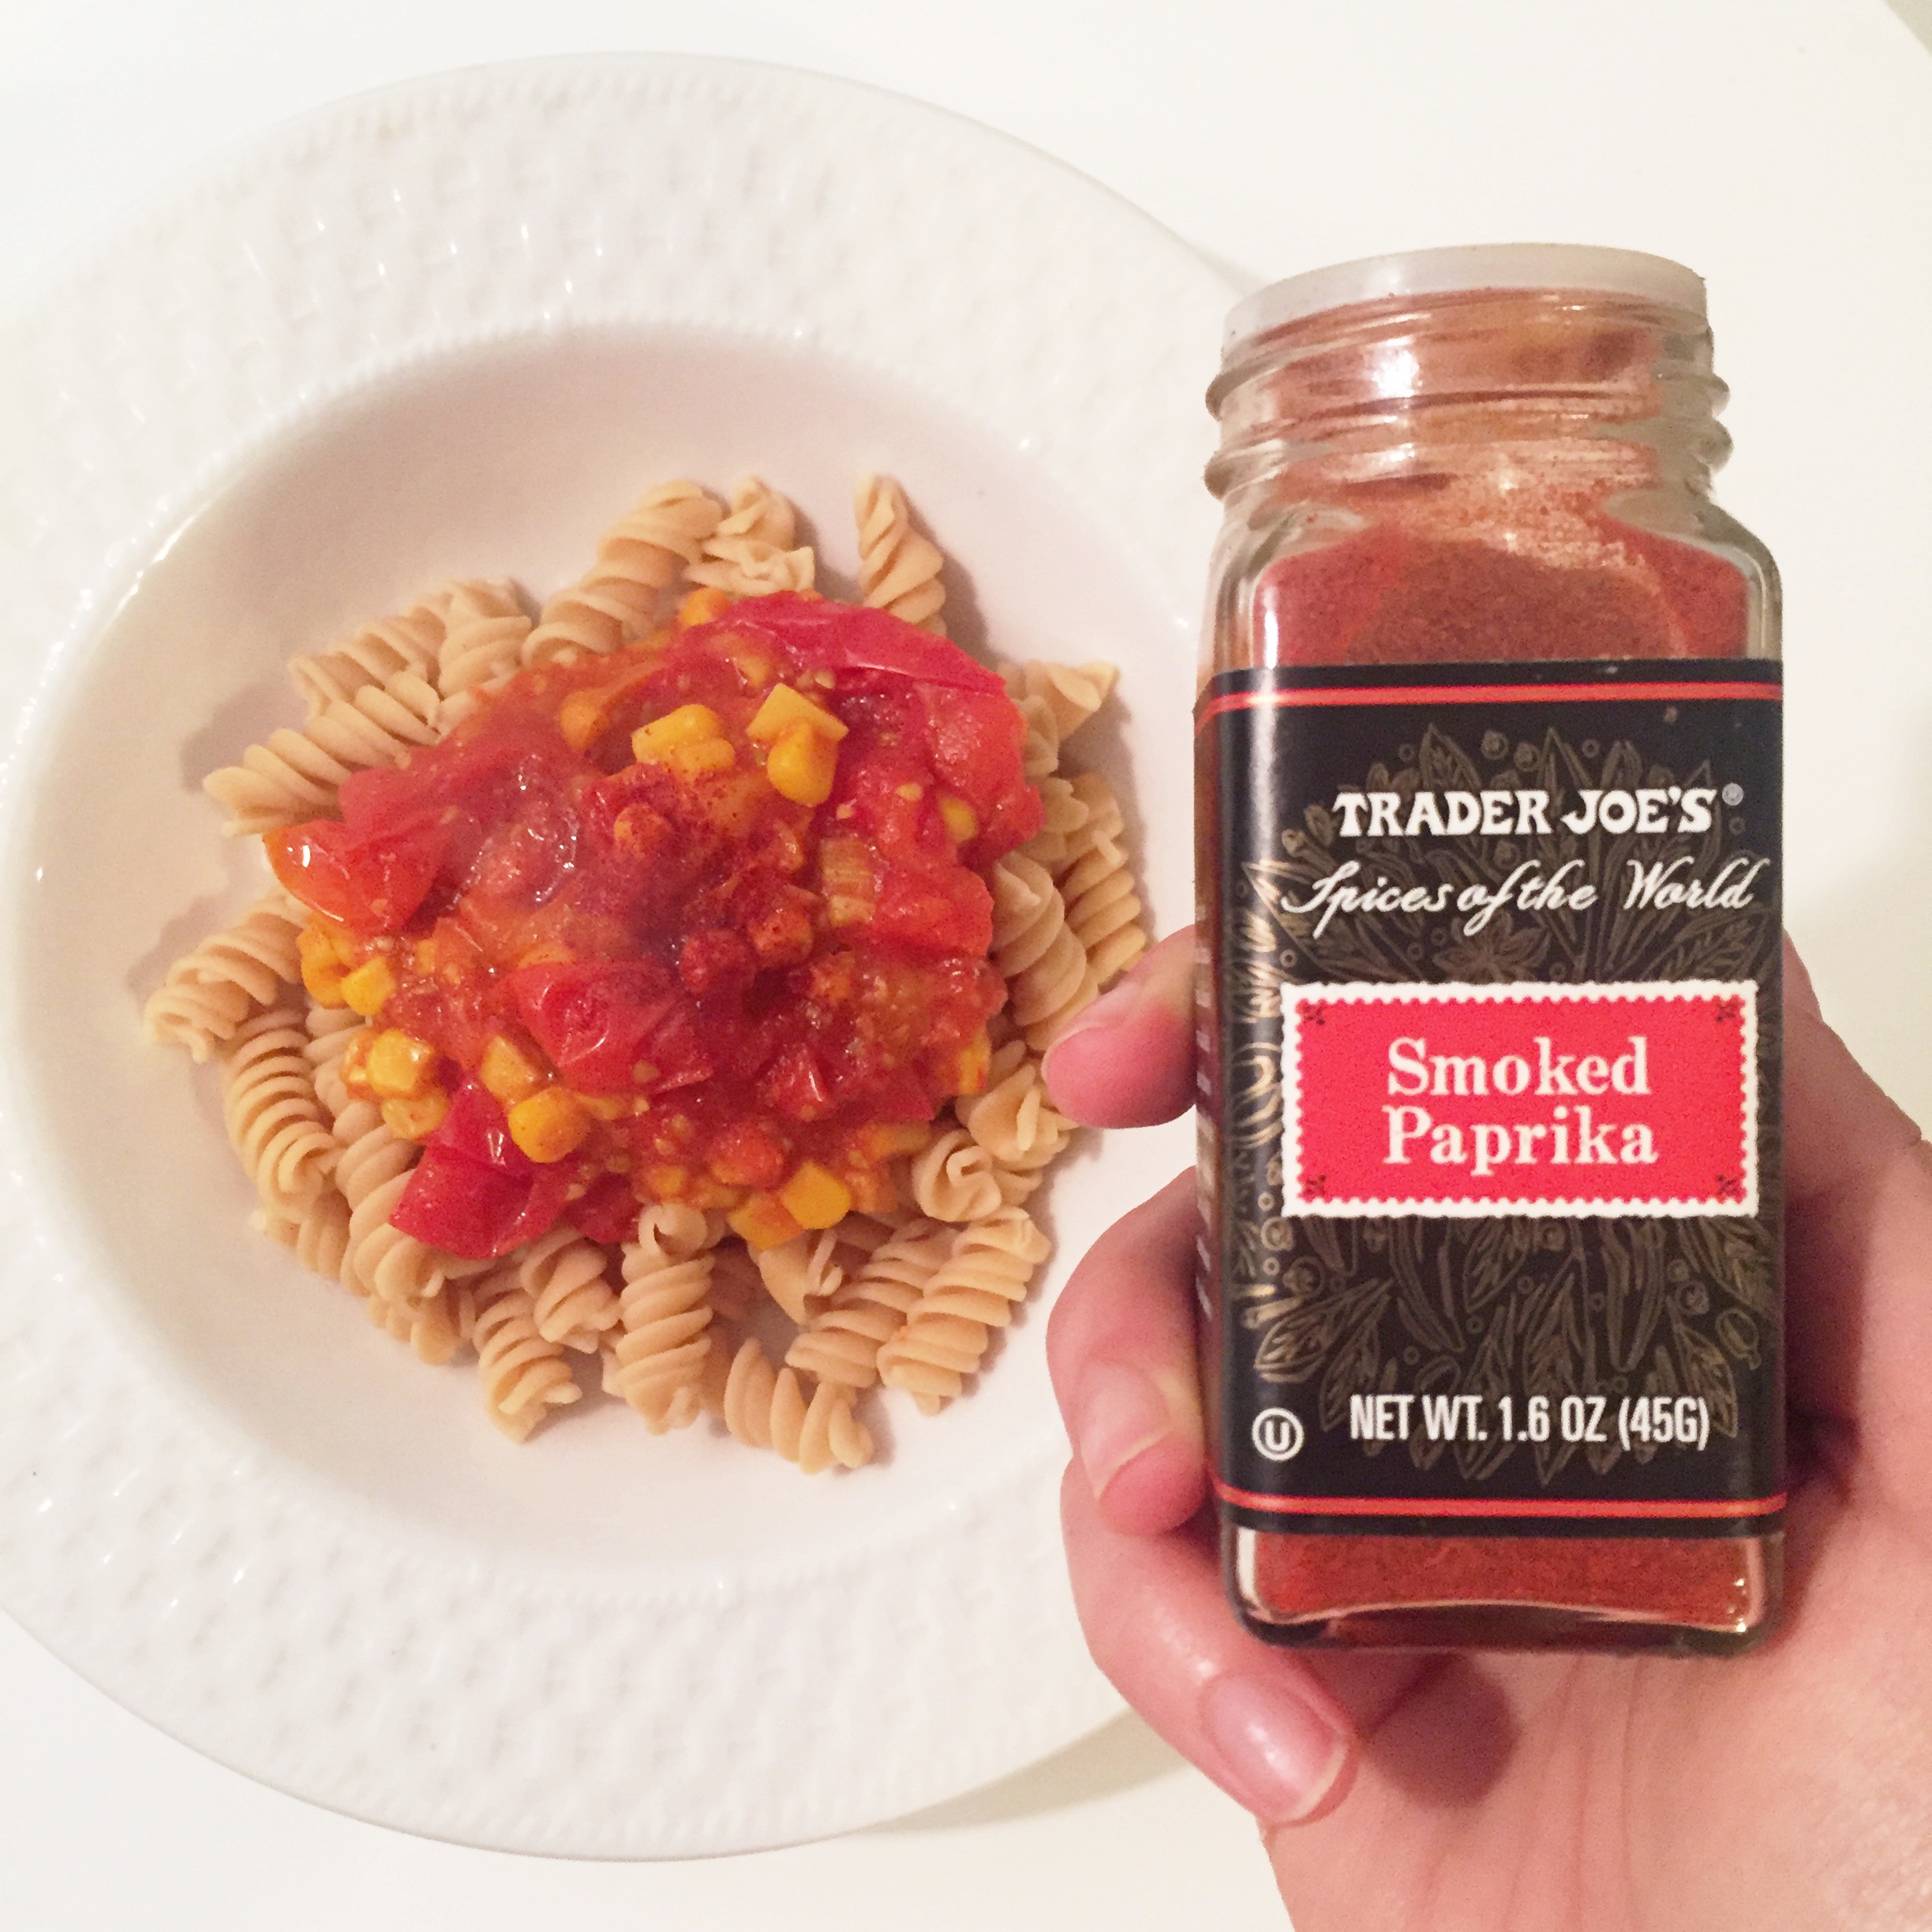
This recipe was entirely unintentionally crafted. But hey, they say the best things happen when you don't plan them, right!? Anyway, I was making my usual effortless chickpea pasta dinner, when I decided I was craving something mildly sweet. While corn isn't exactly chocolate, it's a starchy vegetable and therefore inherently adds an element of sweetness. (Remember, starch is a form of sugar). I added in the corn kernels, which prompted me to kick the southwest theme up a notch. That's when the paprika sealed the deal. If I had some cojita cheese on hand, I would have definitely sprinkled a teaspoon or two on top, so if that sounds good to you, go for it! Feel free to add in whatever vegetables you think might pair nicely with this dish - oh, and then share it with me!! You guys constantly give me a ton of #foodinspo, so keep me posted :) 

Ingredients (serves 1):

  • 3/4 dry cup chickpea pasta (I used Banza)
  • 1 1/2 cups cherry tomatoes, halved 
  • 3 medium pearl tomatoes, quartered 
  • 2 cloves garlic, diced 
  • 1/2 cup corn kernels (corn in water, no sugar added) 
  • 1 tablespoon paprika
  • 1/2 teaspoon salt 
  • 1/2 teaspoon garlic powder 

Directions: 

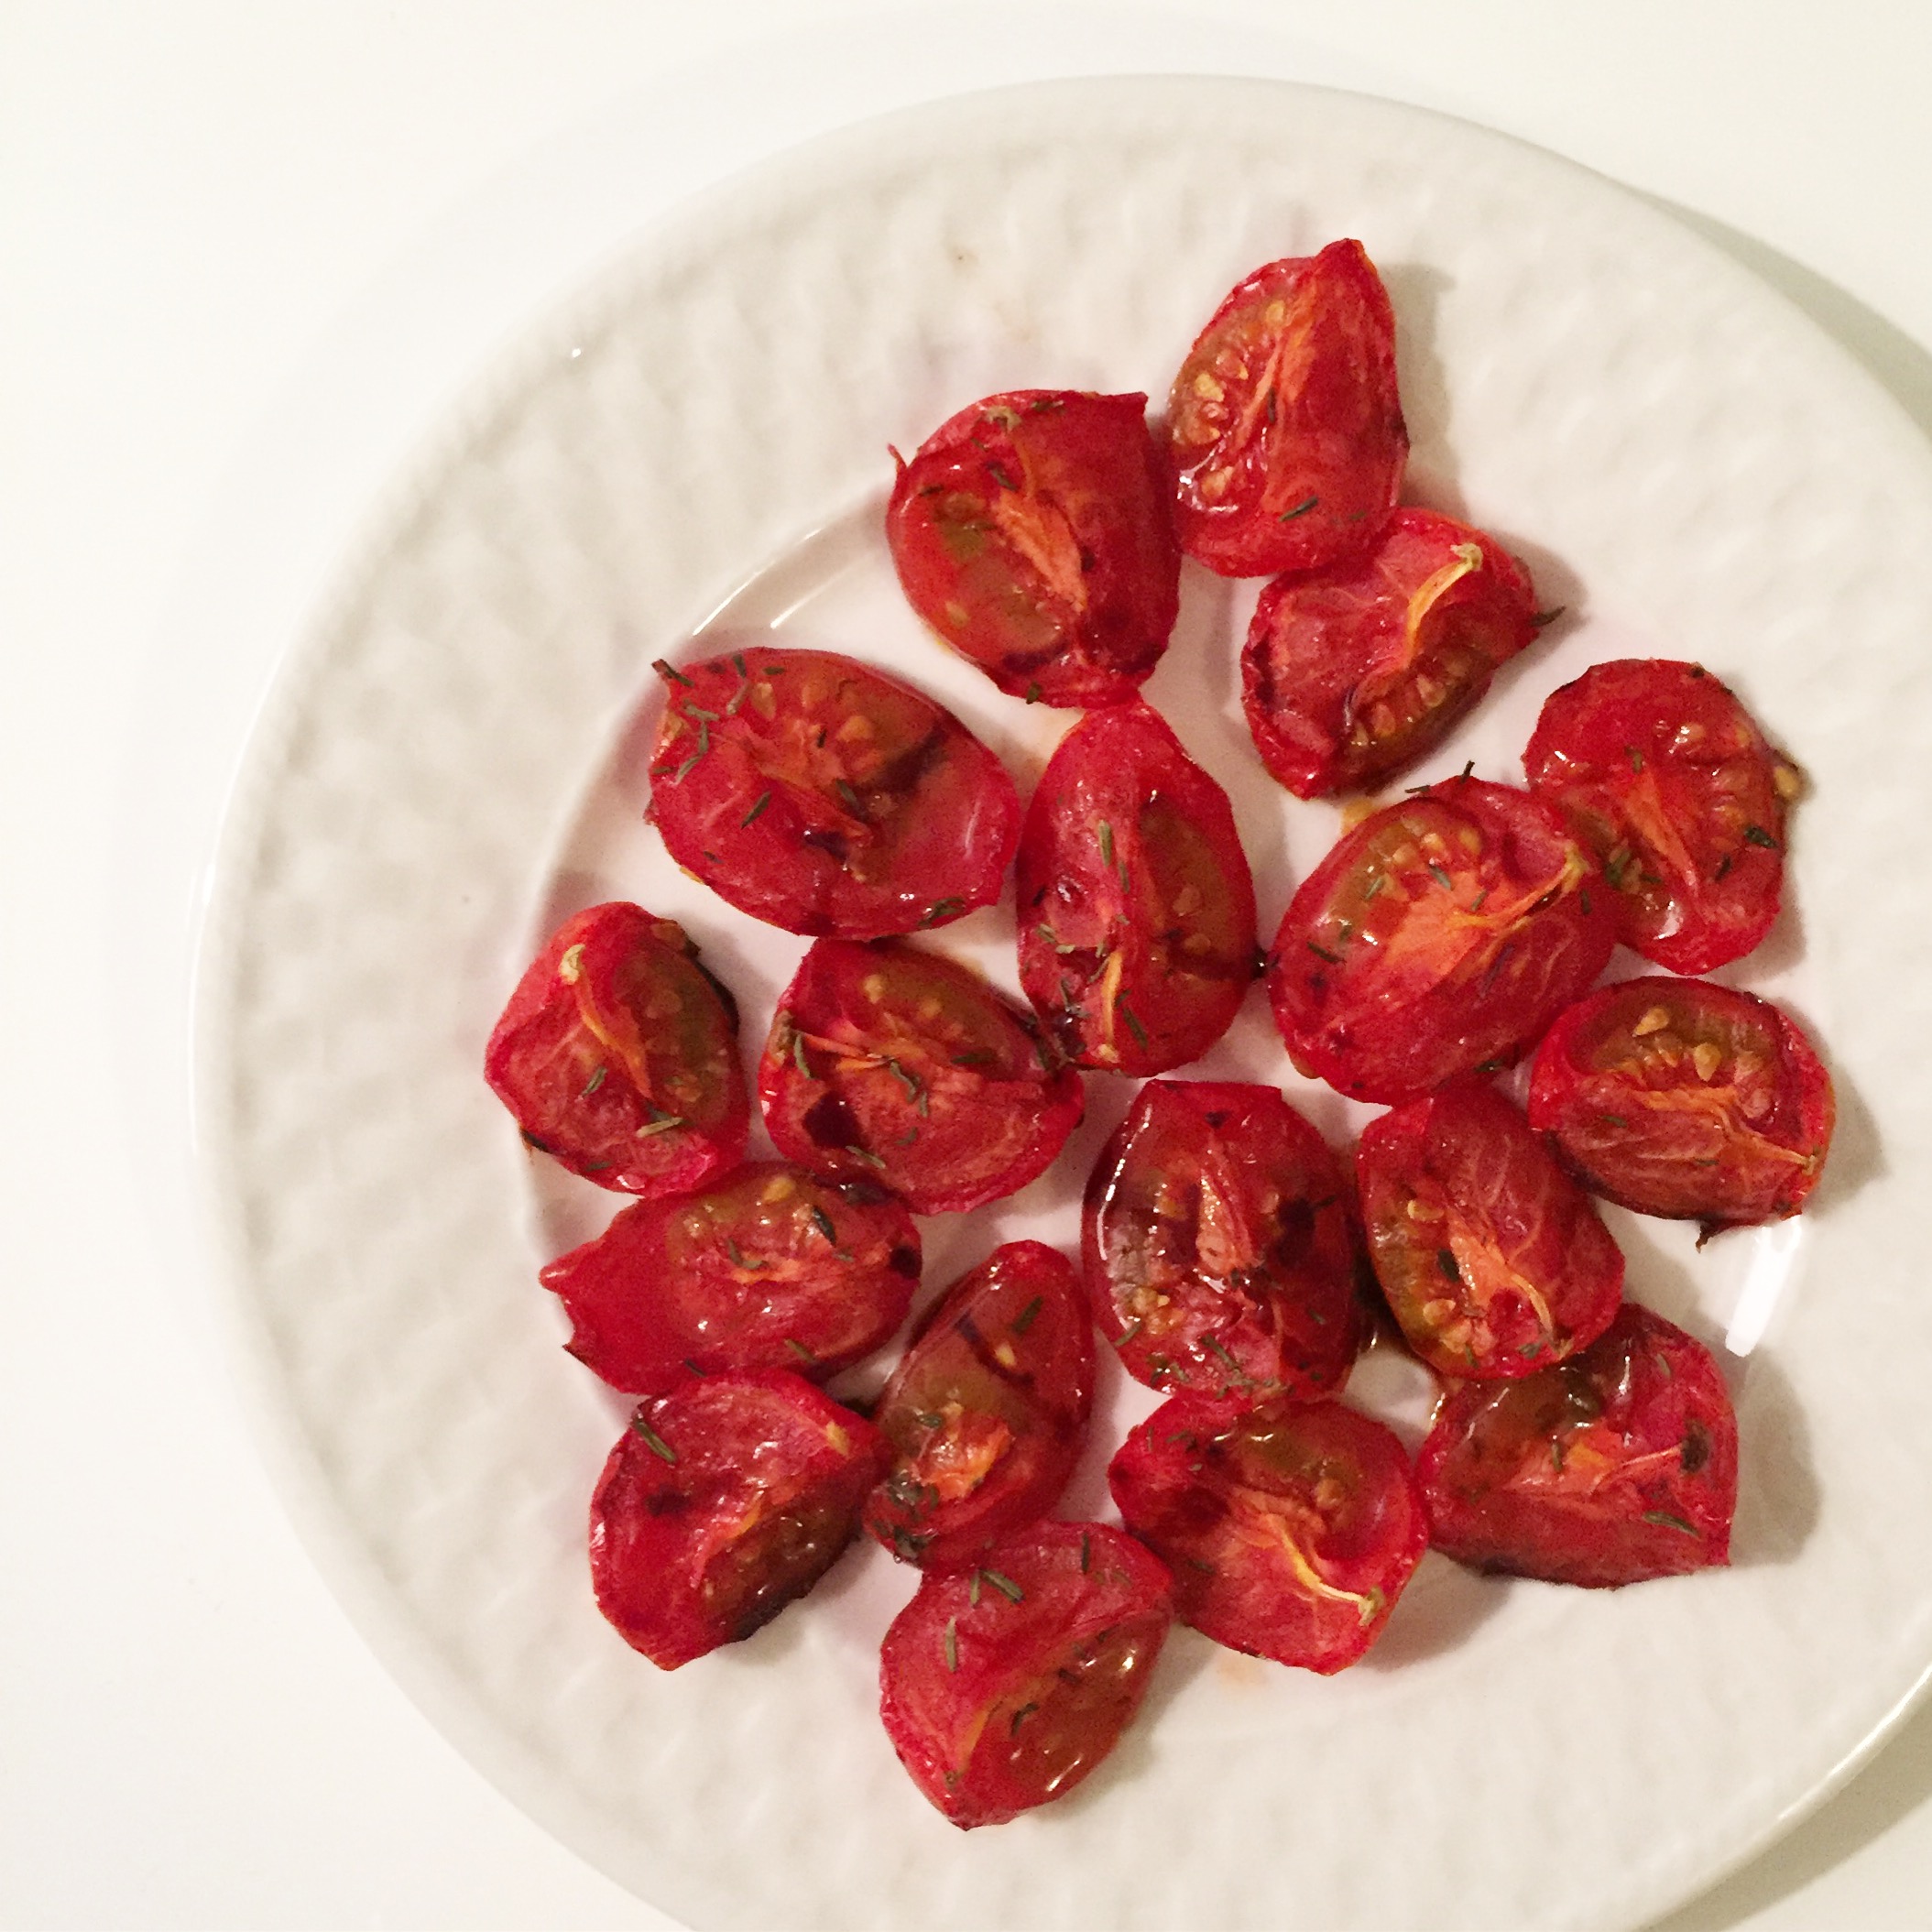
  1. Add halved tomatoes and diced garlic to nonstick pan on stove top over medium heat. You may add a bit of water if contents begin to stick. Allow to saute for about 8 minutes. 
  2. While veggies are sauteing, boil water to begin to make the chickpea pasta (may follow instructions on box). 
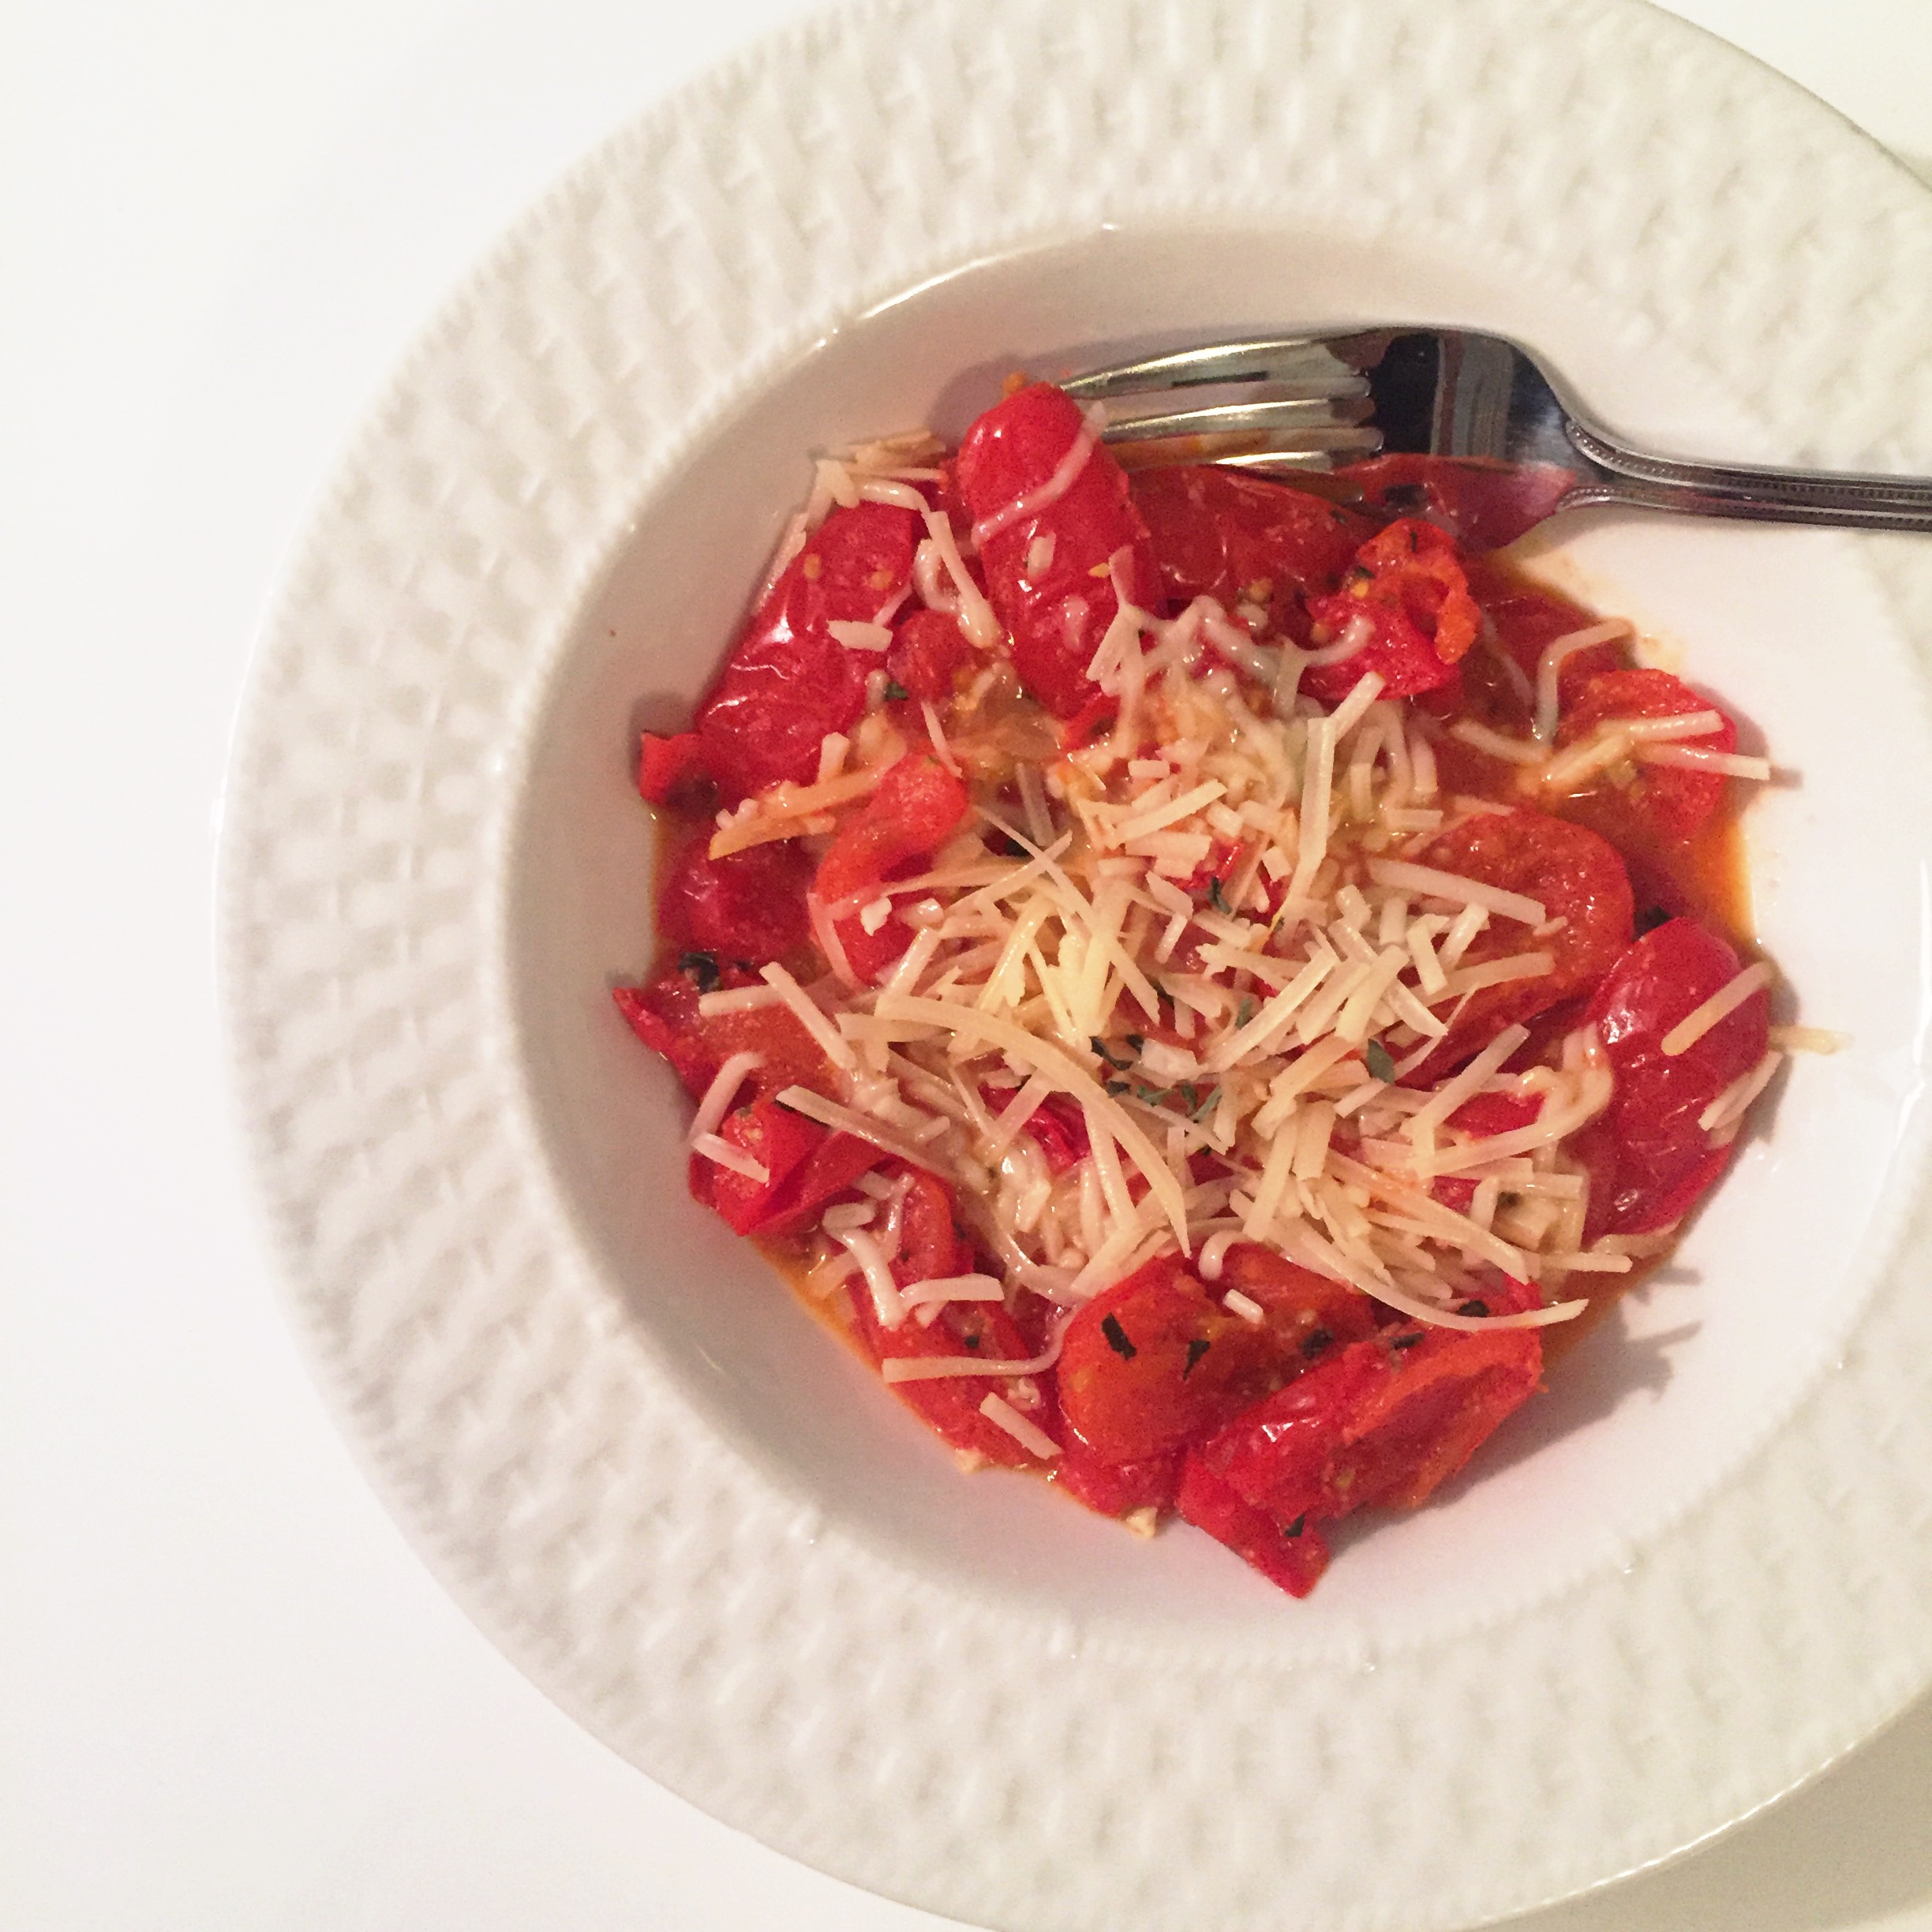
  3. Add corn kernels, paprika, salt, and garlic powder to tomato mixture on stove top. Mix ingredients with spatula and turn heat down to low. Continue to allow to cook for another ~5 minutes. Sauce should appear to have a thicker and chunky consistency. 
  4. Once pasta is cooked, drain water and add noodles to bowl. Add tomato sauce and allow to cool a minute before enjoying. Note: may add paprika to taste, if desired. 

My Feelings On Bars

I'm going to give it to you straight: I believe that bars are really a last resort option. You’ve entirely run out of snacks, you’re stuck in a 4 hour meeting, airplane food grosses you out, or eating on the subway makes you feel awkward. See what I’m saying? We live in a world where real, whole, and natural foods are generally ubiquitous. If you have the opportunity to design your meals and snacks, why settle for often processed ingredients, loads of fat, or excess sugar?

.... But I also understand that the aforementioned situations really do happen. If you’ve ever been stuck in a meeting or taken a really long flight or have been caught in some “emergency” situation that prevents you from eating real food, bars can be the most convenient option. So I’m going to help you make the best decision you possibly can for the next time your boss holds you hostage in a meeting.

In my opinion, there is no single most important factor to consider when you read the nutrition label of a bar. You should take everything into account and weigh the pros and cons. Calories, fat, sugar, ingredients, additives, etc., all are important. You also have to determine what’s a deal breaker for you personally. Someone who is trying to gain weight is going to be less concerned with calories than someone who is trying to lose weight.

Personally, I won’t opt for a bar with more than 250 calories. I prefer it has closer to 200, but 250 is where I tap out. That’s because I don’t view a bar as a meal or a meal replacement, but rather as a snack to hold me over for a few hours until I can have my next meal. Most people don’t mentally register bars as meals, so they end up eating real meals shortly after, in addition to the bar. This is an easy way to mindlessly pack in the calories.

I like to see bars have at least 8-10 grams of protein. Protein combined with fiber and fat helps to keep us full, so it’s important that there’s a decent amount of protein. Oh - and I will only eat a bar made with vegan protein. I’m by no means a vegan, but I do try to stay away from protein isolates. Look for protein from sources like peas, hemp, brown rice, nuts, and seeds.... Or any vegetable.

Sugar can be a deal breaker. I really don’t like to see more than 10-12 grams of sugar in my bars. Sometimes bars contain 15, 20, or even 25 grams of sugar. If I wanted to eat that much sugar, I’d eat a candy bar! I don’t really care whether the sugar comes from the most organic agave syrup from the most exotic island or not… sugar is sugar people! Some people are sensitive to sugar alcohols, which are common ingredients in bars. They’re often used instead of or in addition to sugar. While I happen to not be sensitive, if you’re inclined to suffer from gastrointestinal issues, you’re going to want to watch for ingredients like “xylitol,” “mannitol,” and “sorbitol,” as those are sugar alcohols that frequent the nutrition labels of bars.

It’s important to read the ingredients carefully. Is the first ingredient some kind of syrup? Is the second ingredient cane sugar? A little tip: ingredients are listed in the order in which they’re most prevalent in a given food product. If syrup is the first ingredient, it is also the primary ingredient in that bar. While the last ingredients are the least prevalent, I still never want to see artificial food dyes or lakes. If your bar is going to be colored, it should be from natural sources, like beets, turmeric, or other spices.

The macronutrient that I haven’t touched on thus far is fat. That’s because I have yet to find a bar that is low in fat. Often bars contain ingredients like nuts and seeds, which are naturally high in fat, so that adds up. For example, if I'm going to eat a bar loaded with almonds or peanuts, I would be confused if the bar was in fact low in fat. It's important to know what you're signing up for. 

By now you’re probably thinking, “well what bar can I eat when I’m in a bind,” right? One brand of bars that seems to do a good job of keeping all of these components in check in SHANTI BARs. Their Spirulina bar has 220 calories, 9 grams of (vegan) protein, 11 grams of sugar, and 6 grams of fiber (bonus!).

Still, more often than not, I find myself having to sacrifice one of these macronutrients (protein, fats, or carbohydrates) for another. For instance, if the ingredients look clean, it may come with a price of 15 grams of sugar. Or, perhaps it’s low(er) in sugar, but instead contains loads of protein isolates. (note: if anyone knows of a bar that doesn't require nutrient sacfrifices, I'm totally open to trying it!!) Quite frankly, I’d prefer to not have to sacrifice anything! Society tends to make us a feel like snack foods should be packaged and store bought, but that’s simply not the case!

The moral of the story is that you should always opt for real, whole food, like an apple and nut butter, or a small lentil soup, or half of a turkey sandwich on multi-grain bread. Bars should be your plan B, not your daily afternoon snack. And when bars are your plan B, be a label detective!


Here's What Courtney Lee is Eating On Game Day

HEY KNICKS FANS!! While I don't typically have the opportunity to sit down with basketball players to discuss their diets - especially during basketball season - Courtney Lee made an exception and let me video conference him from the road. So today, rather than giving you the typical Tuesday recipe (I'll make up for it!!) let's change things up and take a look at what this 6' 5" shooting guard for the New York Knicks is eating to keep himself fueled all season. 

LS: Tell me a little bit about what you focus on when it comes to nutrition and sports performance.

CL: The night before a game I always try to eat something with carbs to give me energy. For instance, I’ll make sure I eat something like pasta. On game day I try to make sure I have chicken, or some type of protein. I definitely focus mostly on staying hydrated. It really helps enhance my performance.

LS: What are you eating in a day leading up to a game?

CL: I always have a big brunch before a game. I eat an egg white omelet with ham and cheese, plus a side of waffles and breakfast potatoes. I’ll also have a stir fry with white rice, shrimp, scrambled eggs, and soy sauce. I eat this until I’m full, then I’ll take a nap. An hour before the game I’ll eat half of a peanut butter and jelly sandwich.

LS: What does a meal look like after a game?

CL: The first 15 minutes after a game is the best time to replenish your body, especially with protein. I’ll usually eat something like chicken, pasta, and rice. Our trainers also make sure we have a protein shake right after the game too.

LS: What are you drinking on game day?

CL: Before the game I have a shot of beet juice, 2 bottles of water, and an espresso. At halftime I have another shot of beet juice and some Powerade. If I’m on the bench, I’ll only drink water.

LS: You’re stranded on an island. What 3 foods are you bringing?

  • Chicken alfredo

  • Filet mignon  

  • Soho house burger and fries

LS: Are there any foods you wouldn’t touch?

CL: Broccoli - I’m allergic.


Asian-Style Cruciferous Stir-Fry

If you've been following us for a bit, you probably know that we look for 3 main factors when we bring you a recipe: 1) Nutrition. We obviously strive to provide the healthiest recipes we possibly can. 2) Taste. If it doesn't taste good, it's not worth your time. 3) Convenience. We're busy, you're busy... we're not full-time chefs, and you're probably not either (but if you are, send us some inspo!!). The less time you spend in the kitchen, the more free time you have - we know! 

This Asian-Style Stir-Fry hits all 3 of these factors, PLUS, you can get creative on your own and add a few ingredients to spice it up! We bring this to you as a delicious side dish, but feel free to throw a fried egg (or two) on top and have it for brunch. OR mix it up with some grilled chicken and you have a stir-fry salad... sort of. Here's how we do it: 

Ingredients (serves 2):

  • 4 cups shredded cabbage, kale, and Brussels Sprouts (note: you may buy this pre-shredded for convenience) 
  • 3 cloves garlic, minced 
  • 2 teaspoons olive oil 
  • 1 tablespoon sesame oil
  • 2 tablespoons low-sodium soy sauce
  • 1 teaspoon sesame seeds 
  • Sriracha sauce 

Directions:

  • Add olive oil to pan and turn on medium heat. Add minced garlic and allow to saute until it begins to brown. 
  • Add shredded vegetables. Leave alone for about 1 minute, as vegetables will shrink in heat. Use spatula to mix in pan, to prevent veggies from sticking. After about 3 minutes, add sesame oil and soy sauce. Continue to mix together for about another 3 minutes. Allow to cook until vegetables begin to brown. 
  • Add stir-fry to serving plate and top with Sesame seeds. May add optional dash of sriracha for extra spicy flavor! 

Sweet Corn & Veggie Soup

What started as an attempt at chicken soup, soon turned into vegetable soup, which naturally took another turn and became (one of) the best mistakes I've ever made... 

Sweet Corn & Vegetable Soup!! 

But really. This soup combines the best flavors of a winter veggie soup with the natural sweet flavor from corn. Per usual, this soup IS NOT difficult to make. It takes a total of approximately 30 minutes, most of which does not require you to stand in the kitchen. Here's how to make it: 

Ingredients (serves 3):

  • 4 large carrots, chopped
  • 3 long celery stalks, chopped
  • 2 cloves garlic, minced
  • 2 parsnips, chopped
  • 1/3 cup yellow onions, chopped
  • 1 can yellow corn kernels, in water
  • 1 quart low sodium vegetable stock
  • 1/2 teaspoon pepper
  • 1/2 teaspoon turmeric

Directions:

  1. In a large pot, combine all vegetables except for corn, and turn heat to medium-high. Add a bit of vegetable stock to prevent veggies from sticking to bottom of pot. Place lid on pot and heat for about 5-8 minutes.
  2. Add the rest of the vegetable stock, remove the lid, and continue to cook on medium heat for another 20 minutes. Mix vegetables occasionally. 
  3. Add can of corn and allow some of the water from the can into the soup. Add pepper and turmeric, and allow to cook for another 5 minutes. Enjoy!

How To Navigate The Holidays AND Still Have Fun

The holidays are one of our FAVORITE times of the year! Between the decorated trees, the holiday music on every single radio station (cough: Mariah Carey), the nightly holiday movie reruns, and of course our family gatherings, it's safe to say that the holidays really boost our spirits... BUT the holidays also tend to be synonymous with lots of food, cookies, hot cocoa, eggnog, and other unhealthy seasonal finger foods. And of course there's always that uncle you rarely see who guilt trips you into eating his 5,000 calorie bread pudding. While you shouldn't sit on the sidelines and pout as everyone else partakes in the fun, you can use some of our tips so you won't feel like your 2016 diet regimen will completely go to waste. 

  1. Eat Before You Go! Yes, we're telling you to eat before you eat. If you walk into a holiday party completely ravenous, you're more likely to eat the first thing see, regardless of whether it's healthy. For all you know, that could be the bacon-wrapped pigs-in-a-blanket! Probably not how you anticipated kicking off the holidays. Now, this doesn't mean you should come to the party without an appetite! Snack on something small to curb your hunger so you're able to make conscious decisions about what you want to eat. We're talking an apple and some nut butter, or two hard boiled eggs. Keep it simple! 
  2. Make Your Plate & Walk Away! We cannot stress enough the perils of lingering at the buffet table!!!! The longer you linger, the more likely you are to keep adding as you eat. The mac n' cheese doesn't magically continue to appear on your plate - you keep refilling it! Make your plate and sit down somewhere away from the buffet table. Once you eat, allow yourself some time between your firsts and your seconds (we know seconds are inevitable). 
  3. Decide Your Dessert. Telling you to abstain from all dessert would be downright cruel. SO, we're telling you scope out the dessert deal before you dive in. If you've had your eye on the pecan pie all night, allow yourself a small piece. But don't combine the pie with the cookies with the cake with the ice cream. Decide what you're going to try ahead of time, because the "a little bite of everything," bit is rarely successful. 
  4. About The Alcohol: If you don't drink during the Holidays, power to you! If you do, keep reading. This probably isn't new information, so we're gently reminding you to AVOID THE EGGNOG (and all cousins of the eggnog! If it's sweet and sugary and heavy - red flag!). It's never a good idea to drink your calories, especially when you are already eating a ton! However, we do understand that the standard vodka-soda with lime just may not be what you have in mind, so we have a solution. Belvoir Fruit Farms makes some delicious holiday mixers with all organic ingredients, so we propose adding some to your vodka-soda! Now, these mixers still do have sugar, so we add about 1/4 cup to our drinks for a boost of delicousness! The organic elderflower and ginger beer are two personal favorites. 
  5. Catch Up! The holidays aren't only about eating and drinking (right!?). Rather than focusing on the array of food, focus on catching up with family and friends. There has to be someone you haven't seen in a while, so find out what he or she has been up to! When you're occupied, you're less likely to be anxious about the food around you, so chat it up! 

Stretch It Out With @yogiberi

Leah: What is yogiberi and what lead you to become a yoga instructor?

Erika: Growing up I was into sports and I’m not naturally flexible at all! I never stretched and was barely even able to touch my toes. After college, I lived out west in Colorado where I found that yoga was the perfect balance to my active lifestyle. It was also super popular and all of the locals were doing it. When I first started out, I just followed what the other people around me were doing because I didn’t know the names of the poses. A year after living in CO, I moved to NYC, started working in the fashion industry and found that I needed to practice yoga daily for my mental wellbeing. After living in a ski town surrounded by fresh air and mountains, I was totally overwhelmed by the fast pace of NYC. Yoga completely helped me acclimate to the hecticness of NYC.

After a few years of living in NYC, I felt the urge to deepen my yoga practice and began to research different yoga teacher training programs. Initially when I signed up for the yoga teacher training, I wanted to deepen my practice, open a yoga studio down the line, but not necessarily become a yoga teacher. I was petrified of public speaking! I kept putting off doing a training because of various life events. I finally pulled the trigger and started my 200 hour yoga teacher training in September 2015 and never looked back! Ironically, I don’t want to open a yoga studio anymore and I ended up switching careers. I work full time as a yoga teacher and am happier than ever!

As far as the name yogiberi, as a kid, my family & closest friends nicknamed me Eri, Eriberi or Beri. I also love berries and eat them every single day. So yogiberi stems moreso from my nicknames and a little bit from my love for berries :).

Leah: Although I’m a dietitian, I really don’t know much about yoga. People swear by the benefits, so I’d love to know more about them! 

Erika: There are a million positive benefits from doing yoga. In yoga, we examine both the physical and subtle bodies. The “subtle” body being the mind. Yoga helps calm the nervous system, it gives a sense of community, increases energy, increases flexibility, strengthens muscles and the list goes on. Personally, I’ve gotten so much more flexible, strong in my core and arms, am more body aware and I feel so much more relaxed after I practice.

Leah: To be honest, I very rarely do yoga (SO guilty), how do I even start? P.S. I’m NOT naturally flexible.

Erika: Yoga is for EVERYONE! Anyone can do yoga at any age, at any stage of life, in any place, flexible or not! I would start by taking a beginner’s class at your local studio where they really break down the fundamentals of each pose. Or I highly recommend scheduling private sessions where I can give you my undivided attention. Private yoga is the best way to deepen and personalize your practice! One of my biggest tips is that your breath is EVERYTHING in yoga.

Leah: Is there any food/beverage that you eat or drink, either pre or post yoga? And why?

Erika: You’re not really supposed to eat before yoga. I wouldn’t recommend eating a full meal right before practicing because you’re more likely to feel lethargic and heavy during practice. If I’m feeling low energy, usually right when I wake up, I just have a banana and a cup of hot water with lemon beforehand. The banana because I like to have a little something in my stomach and the hot water with lemon because it cleanses the entire body. Post yoga I usually have a smoothie - with berries of course.

Leah: Where can I catch your next class?

Erika: I’m back and forth between NYC & Philly (primarily Philly), but catch me in NYC every Monday & Tuesday! I teach on Mondays at Yoga Vida (TriBeCa) at 6am in NYC, on Thursdays at Priya Hot Yoga at 4:30pm in Philadelphia and sub regularly at their studios as well.

MAJOR BONUS: If you email eriespte@gmail.com with the subject "Tovita for Yoga," you are eligible to receive 15% off a private session! This offer expires after 12/31/16, so make sure to schedule your next session ASAP! 

Rosemary & Thyme Roasted Carrots

We've always been inclined to bake our veggies, especially around the holidays. For one, baked veggies seem to taste sweeter and more flavorful versus using other cooking methods. Second, baking is much healthier than steaming, as many nutrients get lost in the water used to steam. Last, we love raw veggies, but they don't convey the same effort as a heartfelt baked dish. I mean, imagine hosting a dinner party and serving a plate of raw carrots. #awkward. 

Here is our super simple and yummy recipe for baked carrots, completely approved for your holiday dinner party. 

Ingredients (serves 4): 

  • 2 large bags of organic carrots
  • 2 tablespoons extra virgin olive oil 
  • Rosemary 
  • Thyme 
  • Salt and pepper to taste 

Directions: 

  1. Preheat oven to 400 degrees F.
  2. Wash carrots with water. Cut in half horizontally. In small bowl, mix carrots, oil, salt, and pepper.
  3. Lay carrots on non stick baking sheet or pan, in a single layer. Add rosemary and thyme - don't be afraid to be generous! 
  4. Bake for about 45 minutes, until carrots are tender. 

Fresh Cabbage and Peanut Salad

We love this cabbage and peanut salad for a few reasons. First, it's an easy way to get your fiber, protein, and healthy fats, in one sitting! Second, it doesn't require much time in the kitchen. Yes, we do ask that you allow the cabbage to sit for an hour - but you certainly don't have to sit with it! Feel free to run your errands, make your phone calls, or take a shower while your cabbage sits - we promise your kitchen won't go ablaze! Lastly, this dish is simply delish! See for yourself and follow our recipe below! 

Ingredients (serves 3-4):

  • 1 medium-sized cabbage, finely chopped
  • 1 tablespoon salt
  • 1/2 cup raw peanuts
  • 1/2 bunch scallions, finely chopped
  • 2 green apples, finely chopped

Dressing:

  • 2 tablespoons olive oil
  • 2 tablespoons rice vinegar
  • 1 teaspoon lemon juice
  • Salt and pepper to taste
  • Sesame seeds to taste 

Directions:

  1. Toss the salt and cabbage in a large bowl and leave for about 1 hour. This will allow the cabbage to expel some of its moisture and reduce bitterness.
  2. While waiting, roast the peanuts in a single later, in a skillet over medium heat. Occasionally toss until they are lightly browned, about 5 minutes. 
  3. In a small bowl, combine olive oil, rice vinegar, lemon juice, sesame seeds, salt, and pepper in a small bowl. Mix and taste. Feel free to adjust ingredients according to taste. (remember: the cabbage is already salted so the dressing may not require much additional salt).
  4. Once the hour has passed, toss cabbage again with hands. Prior to serving, add scallions, apples, peanuts, and dressing. 

Breadless Pizza Bowl

Inspired by eating a TON of cauliflower pizza on Monday night, thanks to our girl @officialcauligirl, we created yet another healthy spin on the classic cheesy slice. We love this recipe because it's super simple (if you can read this, you can make it) and delicious. It combines the flavors of garlic, basil, juicy tomatoes, and melted cheese into a bowl that won't leave you feeling guilty or thinking about your next trip to the gym. Make this for a snack, side dish, or appetizer. 

Ingredients (serves 1): 

  • 1 cup cherry tomatoes or San Marzano tomatoes, halved 
  • 1/4 cup Parmesan cheese
  • 1 tablespoon extra virgin olive oil
  • 1/2 teaspoon garlic powder
  • fresh or dried basil to taste (we use ~1/2 teaspoon dried)

Directions: 

  1. Add olive oil and tomatoes to pan on medium heat. Allow to saute for about 8 minutes before adding the garlic powder and basil. Continue to saute for total of 10-12 minutes. Move around with spatula to prevent burning.
  2. Once sauteed, move hot contents to bowl and add Parmesan cheese. Allow to melt for about 2 minutes. 
  3. Enjoy! May add additional garlic powder or basil if desired. 

Crispy Broccoli Rice

While cauliflower rice has taken the spotlight for quite awhile now, it's looking like it might be time to share the stage with it's cousin, Broccoli! That's right, broccoli rice is officially a thing!! 

This recipe for crispy broccoli rice is super simple and requires just 5 ingredients, 4 of which are likely already sitting in your kitchen cabinet. Serve this as a side to almost any dish, or add in your choice of protein to make it an entree. 

Ingredients (serves 2):

  • 1 large head of broccoli (or 3/4 bag of broccoli rice) 
  • 1/2 cup Parmesan cheese, shredded 
  • 1 tablespoon extra virgin olive oil
  • 1 teaspoon garlic powder
  • pepper to taste 

Directions:

  1. Preheat oven to 350 degrees F. 
  2. Put broccoli head into food processor to make broccoli "rice" if you do not have the pre-riced broccoli.
  3. In a baking tin, add olive oil and broccoli rice. Sprinkle garlic powder on top and gently mix together in tin. 
  4. Allow contents to bake for about 35 minutes. Then open oven and sprinkle Parmesan cheese on top. 
  5. Allow to bake for another 5-8 minutes, until Parmesan appears melted but not burned. 
  6. Allow to cool for about 1 minute before serving. 

Balsamic Tomatoes

Tomatoes are among our favorite versatile vegetables (well, fruits technically). They can be used to make the base of a sauce, thrown into almost any salad, enjoyed simple and plain, or served as a side dish. These balsamic tomatoes are incredibly easy to make and serve as a delicious compliment to just about any meal. Here's how to make them:

Ingredients (serves 2): 

  • 10 tomatoes on the vine, cut into 4 slices (cut horizontally and again vertically) 
  • 2 tablespoons balsamic vinegar
  • 1 teaspoon extra virgin olive oil
  • thyme
  • salt 
  • optional: balsamic reduction 

Directions:

  1. Preheat oven to 350 degrees F. While oven is heating, slice tomatoes as instructed above
  2. Add olive oil to nonstick baking tray and add tomatoes. Drizzle balsamic vinegar and add a pinch of salt and thyme
  3. Bake tomatoes for about 25 minutes
  4. May drizzle 1/2 teaspoon balsamic reduction to enhance flavor post-baking 

Apple Pie Parfait

If you've already gone apple picking this season, you're probably wondering how you're ever going to use all of those Macintoshes. (And if you haven't, apples are practically falling off the shelves right now, so you'll be just fine). Either way, we have the answer to your apple abundance and it's super sweet - really, though. 

This apple parfait requires a little chopping and baking, but we promise it's totally worth it! We recommend baking a bunch of these apples at once, so you can make this several times throughout the week. Follow below. 

Ingredients (serves 1):

  • 2 large Macintosh apples, diced (or 4 small Macintosh apples) NOTE: recommend baking about 6 medium apples, diced, to store extra. 
  • 6 oz plain, nonfat Greek yogurt
  • 6 walnuts, crushed 
  • ~1 teaspoon cinnamon 

Directions:

  1. Preheat oven to 375 degrees F. 
  2. While oven is heating, dice apples into ~ 1/2 inch pieces. Spread apples onto nonstick baking sheet or pan. If pan, add ~2 tablespoons water 
  3. Sprinkle cinnamon over apples
  4. Bake for ~35 minutes. Apple slices should maintain their diced shape
  5. Allow to cool for about 20-30 minutes
  6. In glass or jar, layer yogurt and apples, as pictured above. In the last layer of apples, sprinkle crushed walnuts on top
  7. ENJOY! 

Mango Kefir Ice Cream

We've made berry ice cream, we've conjured up recipes for banana sundaes, but we have yet to use our beloved mangoes in the dessert department. This recipe is actually inspired by the traditional Indian lassi smoothie, which is essentially a mixture of fruit, milk, and spices. However, below we've swapped the milk for kefir to provide some probiotic power and a more ice-cream-like consistency. We've also topped the sweet treat with chili lime powder to give the perfect balance of sweet, salty, and zesty!  

Ingredients (serves 1): 

  • 1 1/2 cups frozen mango, cubed
  • 3/4 cup of plain kefir (we used Lifeway
  • Chili lime powder 
  • Optional: coconut flakes 

Directions:

  1. Blend mango and kefir together on high, until contents appear well blended. 
  2. Pour mixture into bowl, and top with ~1/2 teaspoon chili lime powder (may add more/less to taste)
  3. May add ~1 tsp coconut flakes

Pumpkins and Pecans and Pears OH MY!

What comes to mind when you close your eyes and picture the autumn season? Perhaps Pumpkins? Cinnamon? (Okay fine, cute sweaters too). We've combined some of our favorite Fall flavors to make a super seasonal and delicious smoothie! Enjoy with breakfast or as a daytime sweet snack. You're welcome! 

Ingredients (serves 1): 

  • 1 banana (preferably frozen) 
  • 1/3 cup organic pumpkin puree 
  • 1/2 Bosc or William's Pear, diced 
  • 1/3 cup unsweetened almond milk 
  • 1/2 teaspoon Pumpkin Pie spice blend (may substitute with cinnamon & nutmeg) 
  • 1 teaspoon vanilla extract 
  • 8 pecans 
  • 1 Graham cracker, crumbled (optional)

Directions:

  1. Set graham cracker and pecans aside. Combine all other ingredients in blender. Blend on high until all ingredients appear evenly distributed. 
  2. Top with crumbled graham cracker and pecans. 
  3. Take a picture (because it's 100% Instagram worthy) and Enjoy!! 

Cucumber Kimchi Salad

Probiotic foods have made headline news for quite some time now. At this point you probably understand that there are incredible health benefits to including some of these foods in your diet, but you may not be sure exactly how. After all, kimchi isn't exactly the type of food you can easily throw in your smoothie (gross).

Today we are sharing the simple recipe for one of our favorite probiotic salads - the cucumber kimchi salad. We can't take credit for fermenting the kimchi ourselves, but we certainly can give credit to our friends at Mother In Law's.

Ingredients (serves 2):

  • 6 Persian Cucumbers 
  • 1/2 jar Mother In Law's Kimchi (we used House Napa Cabbage) 
  • 2 tablespoons rice vinegar 
  • pinch of salt 

Directions: 

  1. Wash cucumbers (no need to peel). Slice cucumbers into medium cucumber "chips."
  2. In medium bowl, combine cucumbers, kimchi, rice vinegar, and salt. Mix together so ingredients are evenly distributed. 
  3. Enjoy! 

Cucumber Noodle Greek Salad

Greek salads have always been one of our dietary defaults. So much so, that we've decided it's time to spruce it up a bit. Rather than using the traditional chopped lettuce base that we're accustomed to, we ditched the lettuce entirely and replaced it with spiralized cucumber noodles. If zucchini and squash can do it, why can't cucumbers!? Try the recipe below for a new spin on your favorite classic. 

Ingredients (serves 1):

  • 1 large cucumber
  • 10 cherry tomatoes, halved
  • 1/4 cup yellow onions, diced
  • 5 Kalamata olives, halved 
  • 2 tablespoons feta cheese 
  • Dill (to taste) 
  • Thyme (about 2 pinches) 
  • 2 tablespoons apple cider vinegar 

Directions:

  1. Wash cucumber and slice off both ends, flatly and evenly. Halve cucumber and send through spiralizer. Place cucumber noodles in bowl. 
  2. Add tomatoes, onions, and olives to bowl. Add thyme and dill. Mix together so all ingredients appear evenly distributed. 
  3. Add feta on top.
  4. Enjoy! 

#WeAteWhat Summer Quinoa Bowl

We decided to shake things up by combining food with fashion! Danielle Bernstein of WeWoreWhat challenged us to create a quinoa salad using some of her favorite ingredients (ie. avocado - anyone shocked!?) The summer salad we concocted is SUPER simple and refreshing. We recommend making a batch in the beginning of the week to have for meals or snacks throughout the week. Use the recipe below or watch us cooking together here!

Ingredients:

quinoa salad recipe
  • 1 cup quinoa (any color)
  • 1 cup peas (fresh or frozen) 
  • 1/3 cup mushrooms, diced 
  • 1 cup orange slices, thick 
  • 1/4 cup feta cheese, crumbled 
  • 2 tbsp yellow onions, diced 
  • 1/2 avocado, diced 
  • 1 tbsp olive oil 
  • optional: 1 grilled chicken breast 

Directions:

  1. Boil quinoa on one burner. Remember, 1 part quinoa, 2 parts water. Bring quinoa & water to rolling boil, then turn flame to medium/low and cover pot until water evaporates. 
  2. On a separate burner saute onions and mushrooms in olive oil until onions turn golden brown. 
  3. Once quinoa is cooked, place in separate bowl and allow to cool.
  4. Add peas, mushrooms, onions, orange slices, avocado, and feta cheese to quinoa. Mix together until ingredients appear evenly distributed. Enjoy! 
quinoa salad we wore what

FINALLY! Protein and energy bars we can get behind

Had enough of the high sugar and artificial protein bars that saturate the aisles of grocery stores? Us too. That's why when we came across Shanti Bars, we were so excited that we immediately contacted the founders to find a way to spread the word to our followers. We chatted with Lauren and Ashanty to hear their story.

shanti bars

Shanti bars are vegan, raw, kosher and organic. They are packed with superfoods such as chia and hemp seeds, acai, spirulina, cacao, goji berries and mulberries.  The founders take their passion and purpose seriously, as they created this bar to provide active, busy people with real, natural, sustainable energy.

coconut shanti
shanti founders

Lauren and Ashanty are both chefs and fellow health nuts living in sunny Miami. As an outdoor cycling fanatic, Ashanty grew frustrated with the lack of healthy, natural protein bars on the market and therefore decided to put her culinary skills to work. She created the Shanti bars in her kitchen and used friends at her gym as guinea pigs.

Lauren, a fellow chef and one of the first guinea pigs, quickly became hooked and they partnered up to turn their passion into a business. They had to find a way to take these bars from Ashanty’s kitchen to store shelves for the masses to enjoy. Their hard work has paid off as their partnership with Whole Foods launched just this week! 

The protein bars offer 17 grams of natural protein, which are great for a pre or post-workout snack, while the energy bars provide 7-9 grams. All of the bars are between 220-260 calories, have around 5 grams of fiber, and around 11 grams of sugar. With all natural, raw, and vegan ingredients, the nutrition label is most certainly Tovita approved! Rather than the traditional and familiar chocolate or vanilla bars, Shanti bars have unique flavors like goldenberry, coconut, turmeric, acai, cacao and goji. 

Lauren and Ashanty were kind enough to provide our clients and followers with a 15% off discount code! Order online now using our code TovitaForShanti.

We recommend getting the variety pack to try all the flavors, but our personal favorite is the cacao protein bar… just saying!

Try them all and let us know which is your favorite flavor! 

Thanks, Lauren & Ashanty!

We Just Invented the S'MOBBLER and You Need To Try It!

The origin of the s'mobbler is actually quite simple. At Tovita Nutrition, we love a good sweet indulgence. The problem with summer is that the frequency BBQ's and beachside bonfires make the "sweet indulgence" more of a regular habit, also known as a diet disaster. 

In search of a healthy alternative to our two favorite summer desserts, s'mores and blueberry cobbler, we combined the two into one insanely delicious AND healthy dessert! Meet, the s'mobbler! 

unnamed.jpg

This award-winning genius delight (if we do say so ourselves) contains 3 ingredients: fresh blueberries, white peaches, and graham crackers. That's it! Here's how to make it: 

Ingredients:

  1. 3 cups of fresh blueberries (or thawed, frozen) 
  2. 2 white peaches, diced
  3. Box of organic graham crackers  

Directions: 

  1. Combine blueberries and peaches into saucepan. Add a splash of water and turn flame on medium. 
  2. After about 5 minutes, place a lid on top of the saucepan. Cook for about another 5 minutes (total of 10-12 minutes) or until the liquid in the pan appears to have a syrupy consistency. Allow to cool for about 10 minutes. 
  3. Break the graham crackers in half and add about a tablespoon of cooked fruit to each cracker. Enjoy open faced or with a s'more-like graham cracker on top!